
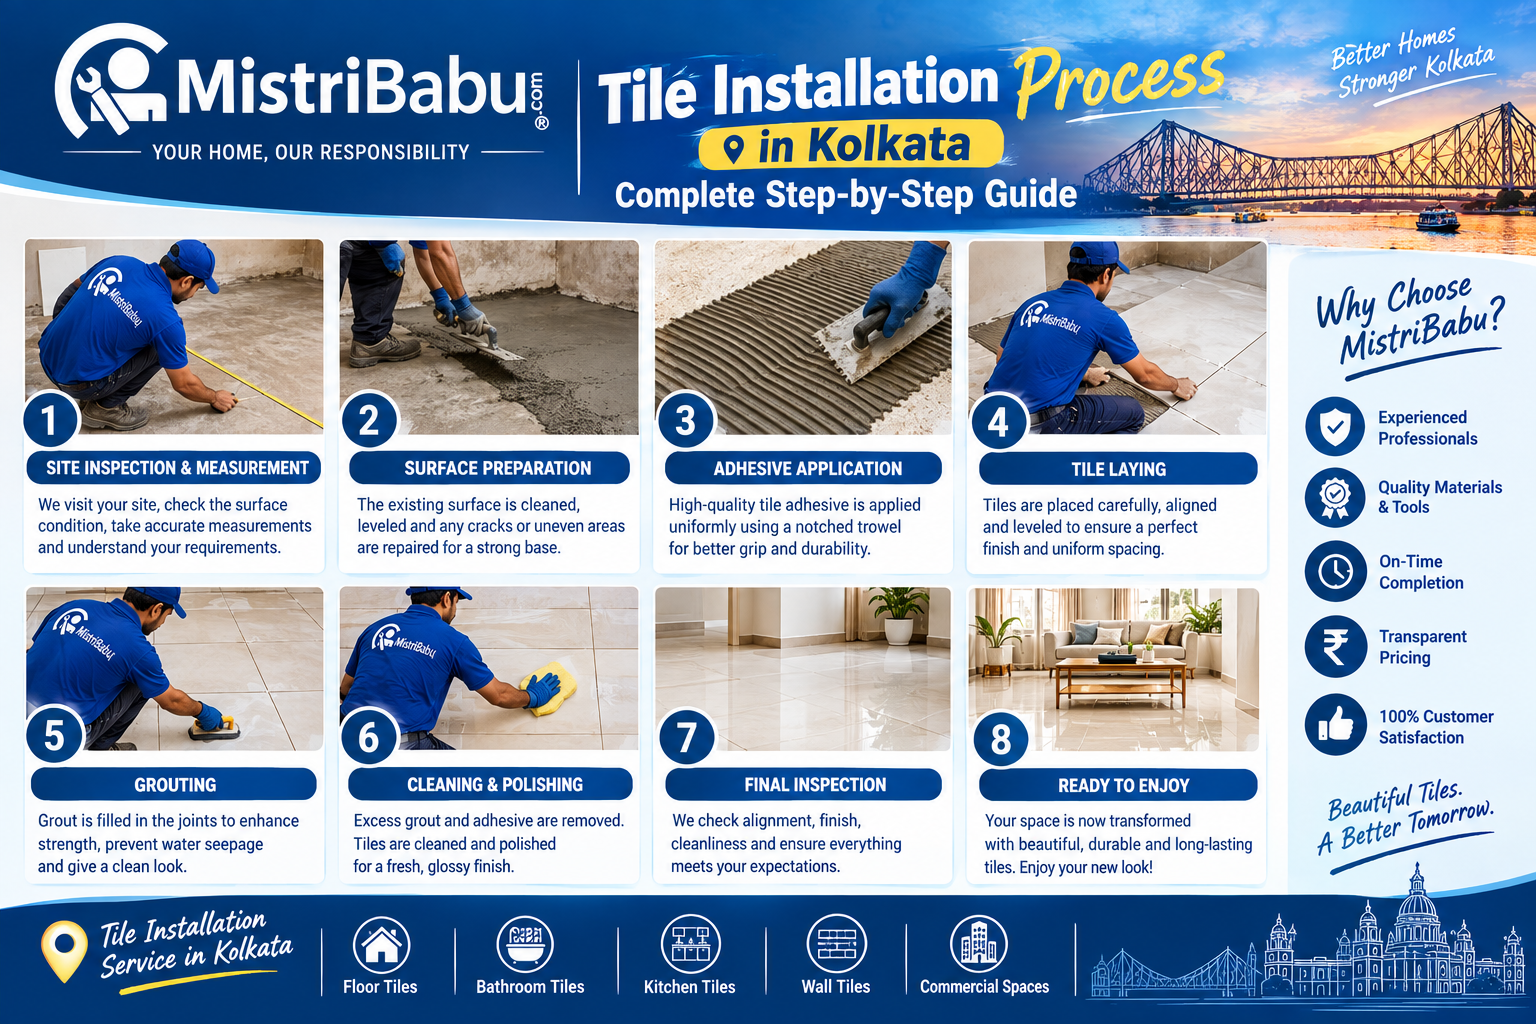
Tiles are one of the most popular choices for floors and walls in homes, apartments, offices, shops, bathrooms, kitchens and commercial properties. A properly installed tile surface can improve the appearance of a property while providing a durable, easy-to-clean and moisture-resistant finish.
However, professional tile installation is not simply about applying adhesive and fixing tiles. Proper measurement, surface preparation, layout planning, waterproofing where required, tile cutting, adhesive application, alignment, grouting and finishing all have an important role in achieving a long-lasting result.
If you are planning tile installation in Kolkata, this complete guide explains the process step by step and covers residential and commercial locations across Kolkata and surrounding areas.
What Is Tile Installation?
Tile installation is the process of preparing a surface and fixing ceramic, porcelain, vitrified, natural stone or other suitable tiles using an appropriate bonding system.
Tiles can be installed on:
- Living room floors
- Bedroom floors
- Dining areas
- Kitchen floors and walls
- Bathroom floors and walls
- Balcony floors
- Terrace areas
- Staircases
- Office floors
- Commercial spaces
- Shops and showrooms
- Hotel and restaurant areas
- Exterior walls where suitable materials are specified
The installation method depends on the tile type, surface condition, location, moisture exposure, tile size and project requirements.
Why Professional Tile Installation Is Important
Good-quality tiles can still perform poorly if they are installed incorrectly. Uneven surfaces, inadequate adhesive coverage, poor alignment, incorrect joints or insufficient waterproofing can result in problems later.
Professional installation helps achieve:
- Proper tile alignment
- Uniform tile joints
- Better surface level
- Strong tile bonding
- Clean tile cuts
- Proper floor slope
- Better drainage in wet areas
- Reduced chances of loose tiles
- Better grout finishing
- A cleaner overall appearance
- Easier maintenance
For bathroom and wet-area installations, surface preparation and waterproofing are particularly important. Professional tile-installation guidance also emphasizes cleaning and repairing the substrate, allowing fresh plaster to cure, waterproofing appropriate wet areas, planning the layout and using suitable adhesive and grout.
Types of Tiles Commonly Used in Kolkata
Choosing the right tile is the first important decision.
1. Ceramic Tiles
Ceramic tiles are widely used for:
- Bathroom walls
- Kitchen walls
- Interior walls
- Decorative areas
- Low-to-medium traffic applications
They are available in numerous colours, patterns, textures and sizes.
2. Vitrified Tiles
Vitrified tiles are commonly selected for residential and commercial floors because of their durability and relatively low water absorption.
They can be used for:
- Living rooms
- Bedrooms
- Dining rooms
- Hallways
- Offices
- Shops
- Commercial properties
3. Porcelain Tiles
Porcelain tiles are dense and durable and can be suitable for demanding applications when the correct product is selected.
4. Anti-Skid Tiles
Anti-skid tiles are particularly useful in areas where water is regularly present, such as:
- Bathrooms
- Shower areas
- Balconies
- Utility areas
- Outdoor spaces
For wet bathroom floors, slip resistance and drainage should be considered alongside appearance.
5. Large-Format Tiles
Large tiles can create a modern, spacious appearance with fewer grout lines. However, they require careful handling and a properly prepared substrate.
6. Decorative and Designer Tiles
Designer tiles can be used for:
- Feature walls
- Kitchen backsplashes
- Bathroom accent walls
- Living-room feature areas
- Commercial interiors
Tile Installation Process in Kolkata: Step-by-Step
Step 1: Site Inspection
The first stage is a detailed inspection of the installation area.
A professional checks:
- Room dimensions
- Existing floor or wall condition
- Surface level
- Cracks
- Dampness
- Existing tiles
- Plumbing points
- Drain locations
- Door openings
- Electrical points
- Stair dimensions
- Required tile quantity
- Access to the work area
For renovation projects, existing tiles may need to be removed before the new installation begins.
Step 2: Measurement of the Area
Accurate measurements are essential for estimating the quantity of tiles, adhesive, grout and other materials.
The installer measures:
Length × Width = Floor Area
For walls, the surface area is calculated according to the wall dimensions, with appropriate deductions for doors and other openings where applicable.
Additional tiles should normally be planned for cutting, breakage and future replacement. The exact allowance depends on the tile size, room shape, layout and installation pattern.
Step 3: Selecting the Right Tiles
The tile should be selected according to the location.
Living Room
Suitable options may include:
- Vitrified tiles
- Porcelain tiles
- Large-format tiles
- Marble-look tiles
Bedroom
Popular options include:
- Vitrified tiles
- Wooden-look tiles
- Matte-finish tiles
- Porcelain tiles
Kitchen
Consider:
- Easy-to-clean floor tiles
- Stain-resistant surfaces
- Suitable wall tiles
- Appropriate slip resistance
Bathroom
Consider:
- Anti-skid floor tiles
- Moisture-suitable wall tiles
- Easy-to-clean surfaces
- Proper drainage and slope
Balcony and Outdoor Areas
Tiles should be selected according to outdoor exposure, drainage and slip resistance.
Step 4: Surface Preparation
Surface preparation is one of the most important stages of tile installation.
The floor or wall should be:
- Clean
- Strong
- Stable
- Properly levelled
- Free from loose material
- Free from excessive dust
- Free from grease or contaminants
Cracks, weak plaster and damaged areas should be repaired before tile fixing.
An uneven substrate can cause problems such as poor bonding, uneven tiles and inconsistent finished levels. Professional installation guides similarly emphasize preparing a clean, sound and suitably flat substrate before fixing tiles.
Step 5: Removal of Existing Tiles
For renovation projects, old tiles may need to be removed.
The process may include:
- Protecting nearby areas
- Removing sanitary fittings or furniture where necessary
- Breaking existing tiles
- Removing old adhesive or mortar
- Cleaning the substrate
- Repairing damaged surfaces
- Levelling the area
Old adhesive should not simply be covered if it compromises the new installation.
Step 6: Waterproofing for Wet Areas
Waterproofing should be considered before tiling bathrooms, shower areas, balconies, terraces and other moisture-exposed areas where required by the construction system.
A typical bathroom sequence may include:
Surface Preparation → Crack Repair → Waterproofing → Curing/Inspection → Tile Installation
Tile itself should not be treated as the only waterproofing layer. Proper waterproofing and detailing behind or below tiled wet areas are important for protecting the underlying structure.
Step 7: Floor Level and Slope Checking
In bathrooms and other wet areas, the floor should have an appropriate slope toward the drain.
Before fixing tiles, the installer should check:
- Floor level
- Drain position
- Slope
- Door threshold
- Finished floor height
Incorrect slope can lead to standing water.
Step 8: Layout Planning
Tile layout should be planned before fixing begins.
This is where the installer decides:
- Starting point
- Tile direction
- Centre lines
- Joint width
- Border locations
- Pattern direction
- Cutting positions
- Drain alignment
- Door-side cuts
Dry-laying tiles before applying adhesive is a useful way to check the proposed layout and identify awkward cuts before installation.
A good layout generally avoids very narrow tile pieces in highly visible locations.
Step 9: Marking Reference Lines
Reference lines are marked using appropriate measuring and levelling tools.
For floors, the installer may establish centre lines and work outward.
For walls, horizontal and vertical reference lines help maintain consistent alignment.
Starting directly against an uneven wall can gradually cause the tile pattern to drift, so layout planning is particularly important.
Step 10: Preparing the Tile Adhesive
The correct adhesive should be selected according to:
- Tile type
- Tile size
- Substrate
- Interior or exterior application
- Wet or dry location
- Manufacturer recommendations
The adhesive should be mixed according to the manufacturer's instructions.
The installer should avoid preparing excessive adhesive that cannot be used within its workable period.
Step 11: Applying Tile Adhesive
A suitable notched trowel is commonly used to spread adhesive evenly over the prepared substrate.
The adhesive is generally applied in manageable sections so it does not become unsuitable before the tiles are placed.
For larger tiles, the installation method may require additional attention to adhesive coverage and tile bedding.
Step 12: Fixing the Tiles
The tile is carefully positioned over the adhesive and pressed into place.
Tile spacers or an appropriate levelling system may be used to maintain:
- Uniform joints
- Straight lines
- Consistent spacing
- Better visual alignment
The installer continuously checks the surface with suitable levelling tools.
Step 13: Tile Cutting
Tiles must often be cut around:
- Door frames
- Drain covers
- Floor traps
- Toilets
- Wash basins
- Plumbing pipes
- Electrical boxes
- Corners
- Columns
- Stair edges
Professional tile cutting helps produce cleaner edges and reduces unnecessary wastage.
For complicated shapes, accurate measurement is particularly important before cutting.
Step 14: Wall Tile Installation
Wall tiles require careful vertical and horizontal alignment.
The installer normally establishes a level reference before beginning.
Depending on the room and layout, the lower row may be completed after the main wall area so the final cuts can accommodate the finished floor level.
Wall tile installation generally involves:
- Marking reference lines
- Preparing the wall
- Applying adhesive
- Fixing tiles
- Maintaining joints
- Checking vertical alignment
- Cutting corner pieces
- Allowing the adhesive to cure
- Grouting
This approach helps maintain straight and visually consistent rows.
Step 15: Bathroom Floor Tile Installation
Bathroom floors require additional attention because they are exposed to water.
The process includes:
- Surface preparation
- Waterproofing where required
- Drain and slope checking
- Layout planning
- Adhesive application
- Tile placement
- Joint spacing
- Level checking
- Cutting around drains and fixtures
- Adhesive curing
- Grouting
- Final cleaning
Anti-skid tiles may be preferable in areas that regularly become wet.
Step 16: Tile Levelling and Alignment
During installation, each section should be checked for:
- Level
- Straightness
- Joint consistency
- Tile height
- Lippage
- Pattern alignment
Large-format tiles require particularly careful substrate preparation and handling because unevenness can become more visible across a larger surface.
Step 17: Allowing the Tiles to Cure
After the tiles are installed, the adhesive needs sufficient time to cure according to the product manufacturer's instructions.
Heavy traffic or premature washing can disturb newly installed tiles.
The required curing time varies depending on the adhesive, substrate, temperature, humidity and installation conditions.
Step 18: Grouting
After the tiles and adhesive have sufficiently set, grout is applied between the tile joints.
Grouting helps:
- Fill tile joints
- Improve appearance
- Reduce dirt accumulation
- Complete the tiled surface
The grout colour can be selected to:
- Match the tile
- Contrast with the tile
- Highlight the tile pattern
The correct grout should be selected according to the application and manufacturer's recommendations.
Step 19: Silicone and Joint Sealing
Certain movement joints, corners and junctions between different materials should be treated appropriately rather than simply filling everything with rigid grout.
In bathrooms, flexible sealant may be used at suitable junctions such as:
- Wall corners
- Wall-to-floor junctions
- Around sanitary fixtures
- Around bath or shower interfaces
This is particularly important in moisture-prone locations.
Step 20: Final Cleaning
After grouting, the tile surface should be cleaned carefully.
The installer removes:
- Adhesive residue
- Grout haze
- Dust
- Cutting debris
- Construction dirt
Cleaning should be carried out using methods appropriate for the tile and grout.
Step 21: Final Inspection
A professional final inspection should check:
- Tile alignment
- Hollow or poorly bonded areas
- Uneven tile edges
- Grout consistency
- Cracked tiles
- Damaged tiles
- Floor slope
- Drainage
- Corner finishing
- Silicone joints
- Surface cleanliness
Only after the inspection and required curing period should the area be returned to normal use.
Tile Installation for Different Areas of a Kolkata Home
Living Room Tile Installation
Living-room flooring often requires attention to:
- Room symmetry
- Main entrance alignment
- Furniture layout
- Tile direction
- Large-format tile handling
- Edge cuts
A carefully planned layout can make the room appear more balanced.
Bedroom Tile Installation
Bedroom tiles should complement the furniture and interior design.
Common choices include:
- Vitrified tiles
- Wood-look tiles
- Matte tiles
- Marble-look tiles
Kitchen Tile Installation
Kitchen flooring should be practical and easy to maintain.
Kitchen wall tiles can also be used as backsplashes behind:
- Countertops
- Sinks
- Cooking areas
Bathroom Tile Installation
Bathroom installation requires special attention to:
- Waterproofing
- Floor slope
- Drainage
- Anti-skid surfaces
- Plumbing penetrations
- Grouting
- Flexible joints
Balcony Tile Installation
Balcony floors should be planned around:
- Rainwater drainage
- Slope
- Outdoor exposure
- Slip resistance
- Edge finishing
Staircase Tile Installation
Stair tiling requires accurate measurements of:
- Tread
- Riser
- Stair width
- Edge profile
The selected tile should be appropriate for the traffic and slip conditions.
Tile Installation Services in Kolkata and Nearby Areas
Tile installation requirements can vary significantly from one property to another. MistriBabu can target tile installation, tile fixing, floor tiling and wall tiling requirements across Kolkata and surrounding locations, subject to project scope and site assessment.
Central Kolkata
- Park Street
- Esplanade
- Bowbazar
- Sealdah
- Burrabazar
- New Market
- Dalhousie
- B.B.D. Bagh
- Entally
- Taltala
South Kolkata
- Ballygunge
- Gariahat
- Bhawanipore
- Alipore
- Tollygunge
- Jadavpur
- Dhakuria
- Kasba
- Garia
- Lake Gardens
- New Alipore
- Behala
- Ranikuthi
- Golf Green
East Kolkata
- Topsia
- Tangra
- Picnic Garden
- Park Circus
- Tiljala
- Anandapur
- Mukundapur
- EM Bypass
- Ruby
- Science City
North Kolkata
- Shyambazar
- Belgachia
- Dum Dum
- Lake Town
- Ultadanga
- Maniktala
- Kestopur
- Baguiati
- Nagerbazar
- Sinthee
Salt Lake and Bidhannagar
- Salt Lake
- Sector I
- Sector II
- Sector III
- Sector IV
- Sector V
- Bidhannagar
- Karunamoyee
- College More
New Town
- Action Area I
- Action Area II
- Action Area III
- New Town
- Rajarhat
- Eco Park area
- City Centre II area
- New Town residential developments
Kolkata Suburban Areas
- Rajpur
- Sonarpur
- Baruipur
- Maheshtala
- Behala
- Joka
- Barasat
- Madhyamgram
- Dum Dum
- South Dum Dum
- Sodepur
- Barrackpore
- Howrah
- Bally
- Serampore
Common Tile Installation Problems
1. Hollow-Sounding Tiles
Possible causes include:
- Poor substrate preparation
- Inadequate adhesive coverage
- Incorrect installation technique
- Uneven substrate
2. Cracked Tiles
Possible causes include:
- Substrate movement
- Structural movement
- Improper installation
- Impact damage
- Unsuitable tile selection
3. Uneven Tile Surface
This can result from:
- Poor levelling
- Uneven substrate
- Incorrect adhesive application
- Inconsistent installation
4. Cracked Grout
Possible causes include:
- Movement
- Incorrect grout application
- Poor joint preparation
- Moisture-related issues
- Substrate problems
5. Water Pooling
Usually associated with inadequate slope or drainage planning in wet areas.
6. Poor Alignment
This often occurs when the installation begins without a proper layout and reference lines.
Common Tile Installation Mistakes to Avoid
Mistake 1: Skipping Surface Preparation
Tiles should not be installed over an unsuitable substrate.
Mistake 2: Ignoring Waterproofing
Bathrooms, shower areas and other wet zones may require a proper waterproofing system before tiling.
Mistake 3: Starting Without a Layout
Improper planning can create very narrow cuts at walls and corners.
Mistake 4: Using the Wrong Adhesive
Adhesive should be selected according to the tile and application.
Mistake 5: Ignoring Floor Slope
A bathroom floor should drain properly toward the designated outlet.
Mistake 6: Poor Grouting
Inconsistent or poorly finished grout can affect both appearance and maintenance.
Mistake 7: Using Wet Areas Without Proper Curing
Tiles and grout should be allowed to cure according to the relevant product instructions.
How Long Does Tile Installation Take in Kolkata?
The project duration depends on:
- Total area
- Tile size
- Tile pattern
- Surface condition
- Existing tile removal
- Waterproofing requirements
- Number of rooms
- Bathroom renovation requirements
- Tile cutting complexity
- Material availability
- Curing requirements
A small room may be completed relatively quickly, while complete home tiling or bathroom renovation can take several days or longer.
A site inspection is the best way to determine the practical project schedule.
What Affects Tile Installation Cost in Kolkata?
Tile installation cost can vary depending on the project.
Important factors include:
- Tile price
- Tile size
- Tile type
- Installation area
- Labour requirements
- Existing tile removal
- Surface levelling
- Waterproofing
- Adhesive
- Grout
- Tile cutting
- Staircase work
- Large-format tile installation
- Pattern or designer installation
- Transportation
- Debris disposal
Therefore, a site-based quotation is generally more useful than relying on a single standard rate.
How to Choose a Tile Installation Contractor in Kolkata
Before appointing a contractor, consider:
- Previous tile installation work
- Experience with similar tile sizes
- Bathroom and waterproofing experience
- Surface preparation process
- Tile cutting quality
- Grouting quality
- Project supervision
- Material specifications
- Work schedule
- Written quotation
- Scope of work
- Warranty or service terms where applicable
Ask the contractor whether the quotation includes tile adhesive, grout, surface preparation, tile removal, waterproofing and debris disposal.
Tile Installation by MistriBabu in Kolkata
MistriBabu provides construction, renovation, maintenance and repair solutions and can handle tile-related requirements as part of residential and commercial projects.
Tile-related work may include:
- Floor tile installation
- Wall tile installation
- Bathroom tile installation
- Kitchen tile installation
- Balcony tile installation
- Tile replacement
- Tile removal
- Tile fixing
- Tile cutting
- Tile grouting
- Tile renovation
- Waterproofing and tiling coordination
- Complete bathroom renovation
- Home renovation projects
For larger renovation projects, tile installation can be coordinated with plumbing, waterproofing, electrical, masonry, painting and other related works.
Final Checklist Before Completing Tile Installation
Before handing over the tiled area, check:
☑ Tiles are properly aligned
☑ Tile joints are consistent
☑ No visibly damaged tiles
☑ Floor levels are appropriate
☑ Bathroom slope directs water toward the drain
☑ Grout joints are properly filled
☑ Corners are neatly finished
☑ Plumbing points are properly finished
☑ Tile cuts are clean
☑ Surface is cleaned
☑ Adhesive and grout have cured appropriately
☑ Final inspection is completed
Frequently Asked Questions About Tile Installation in Kolkata
1. What is the tile installation process?
The basic process includes site inspection, measurement, tile selection, surface preparation, waterproofing where required, layout planning, adhesive application, tile fixing, cutting, levelling, curing, grouting, sealing and final cleaning.
2. Which tiles are best for bathroom floors?
Anti-skid tiles are commonly considered for bathroom floors because wet surfaces can become slippery. The final selection should consider the manufacturer's specifications, surface texture, drainage and intended use.
3. Do bathroom walls need waterproofing before tile installation?
Wet areas should have an appropriate waterproofing system where required. Tiles and grout alone should not be assumed to provide complete waterproofing.
4. Can new tiles be installed over old tiles?
In some situations, tiles can be installed over an existing tiled surface if the existing surface is stable, properly prepared and compatible with the proposed installation system. However, damaged or loose tiles may need to be removed first.
5. How long does tile installation take?
The duration depends on the area, tile size, surface condition, number of rooms, tile pattern, waterproofing, demolition and other site conditions.
6. Why do tiles become loose?
Loose tiles can be associated with poor substrate preparation, inadequate adhesive coverage, movement, moisture problems or incorrect installation methods.
7. Why is tile layout planning important?
Layout planning helps maintain alignment and reduces awkward or very narrow cuts around walls, corners, doors and other visible areas.
8. Should floor tiles be installed before wall tiles?
The installation sequence can vary according to the project and installer. In bathroom work, the sequence should be planned around waterproofing, floor levels, wall layout, fixtures and the manufacturer's installation system.
9. What is tile grouting?
Grouting is the process of filling the joints between installed tiles with an appropriate grout material.
10. How should bathroom tile joints be finished?
Tile joints should be properly cleaned and filled with suitable grout. Corners and certain changes of plane may require an appropriate flexible sealant rather than rigid grout.
11. Can large-format tiles be installed in Kolkata homes?
Yes. Large-format tiles can be used in homes and commercial properties when the substrate is properly prepared and the correct installation method, adhesive and handling techniques are used.
12. Can tile installation be done as part of a complete home renovation?
Yes. Tile installation can be coordinated with demolition, masonry, plumbing, waterproofing, electrical work, painting and other renovation activities.
13. Do you provide tile installation in Salt Lake and New Town?
Tile installation requirements can be considered across Kolkata locations including Salt Lake, Bidhannagar, New Town, Rajarhat and surrounding areas, subject to site assessment and project scope.
14. Do you provide bathroom tile installation in Kolkata?
Bathroom floor and wall tile installation can be included as part of bathroom renovation or construction projects, along with related waterproofing and plumbing work where required.
15. How can I get a tile installation quotation in Kolkata?
A site inspection is recommended because the actual cost depends on the area, tile type, existing surface, demolition, waterproofing, adhesive, grout, cutting requirements and other project conditions.
Conclusion
A successful tile installation in Kolkata depends on much more than selecting attractive tiles. Proper measurement, substrate preparation, waterproofing in appropriate areas, accurate layout, correct adhesive application, careful cutting, consistent alignment, professional grouting and proper curing all contribute to a durable and attractive finish.
Whether you are renovating a bathroom in Salt Lake, installing new flooring in New Town, upgrading a home in Ballygunge, renovating a kitchen in Tollygunge, or completing flooring work in Howrah, Rajarhat, Behala or other Kolkata areas, the installation process should be planned according to the property's specific requirements.

MistriBabu
Admin